
In this article I am going to make out the steps required for installing and configuring SQL Reporting services on SharePoint 2013. Below steps included are based on my experience while configuring SQL Reporting services on SP 2013.
SQL server reporting services one of the most intelligent and wide used service in SQL server, reports are playing the main role in displaying important data for business users and decision makers. When SharePoint comes to the scene, the picture could be bigger and better with more intelligent features. SQL server reporting services SharePoint integrated mode comes with SQL server since 2005 R2 edition.
Microsoft has released better architecture and manageability in SQL server 2012 edition with SharePoint 2013 integrated mode. In this article i will show you how to install and configure SQL server 2012 reporting services SharePoint integrated mode, and common errors which may happen during the configuration.
SQL server 2012 reporting service architecture has been changed with SharePoint server 2013. Microsoft took the engine, the service and hosting layer and wrapped them in a new SharePoint service application, so you will manage reporting services in your SharePoint farm as a service application, awesome!
Environment
This article will explain the architecture, installation and configuration in a single box environment, though i will explain how to do the same for extended topology. My farm has the following applications installed:
- Windows server 2012
- SQL server 2012 Enterprise (Database engine only installed)
- SharePoint server 2013 Enterprise
The same procedures in this article will also be the same in case of having SQL server in a separate box (recommended).
Step 1 – Installing SQL Server Reporting Services Feature in SharePoint Server Farm (Application server)
SQL server reporting services is the licensed part of the installation and this feature should be installed in all application servers in your farm.
- Run SQL server 2012 installation file.
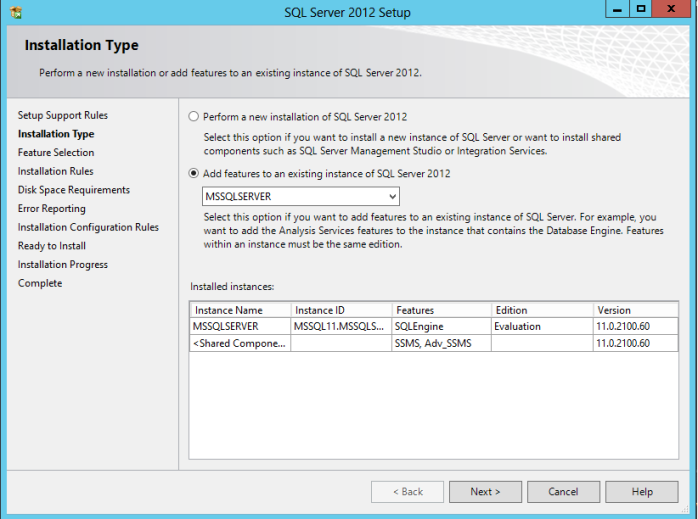
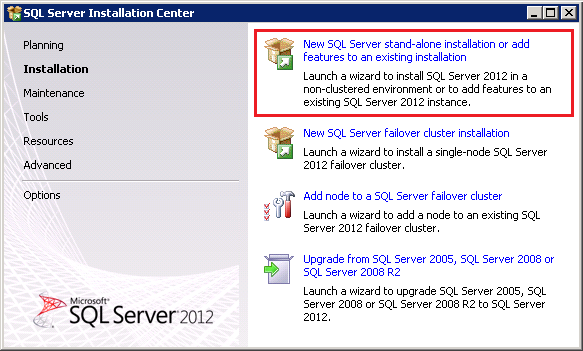
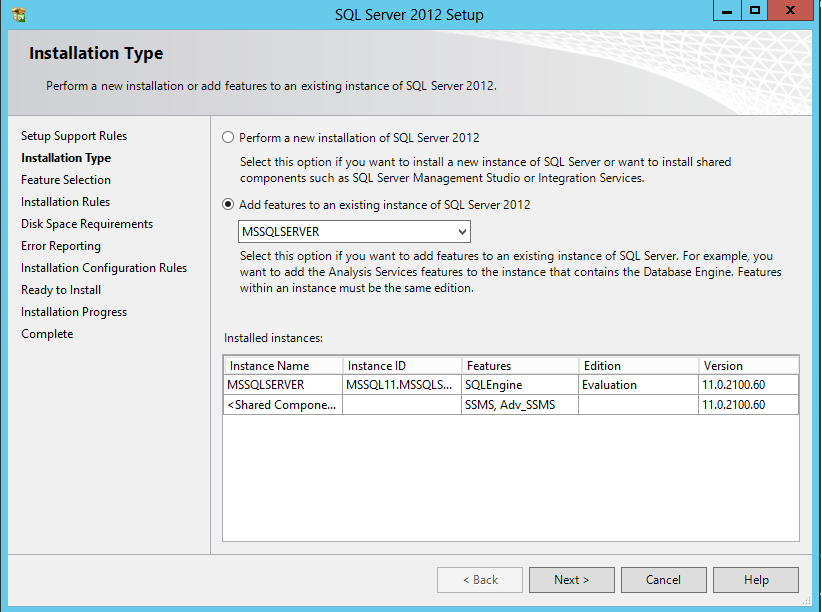
- Select “New SQL Server stand-alone installation or add features to an existing installation”

- Select “Add features to an existing instance of SQL Server 2012″ then select your instance name from the drop down list.
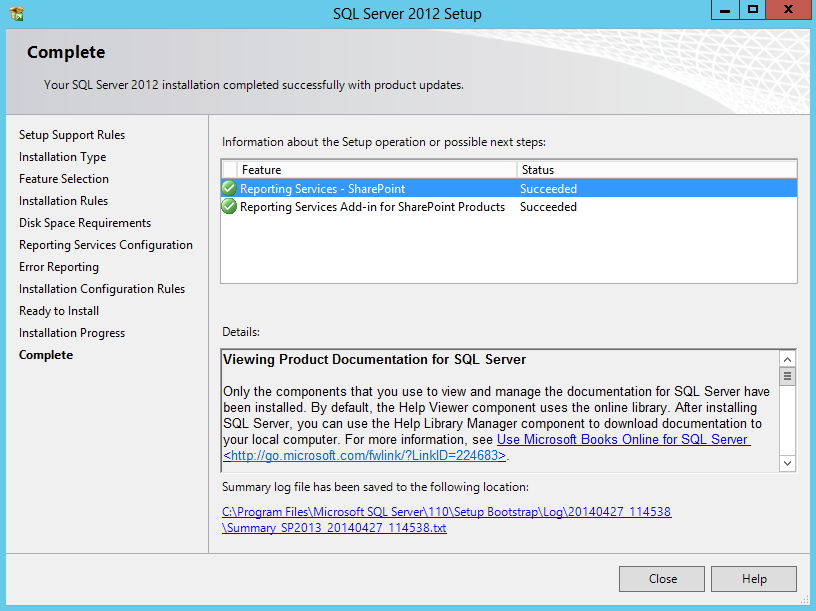
- In features selection, select “Reporting Services – SharePoint” and “Reporting Services Add-in for SharePoint Products”

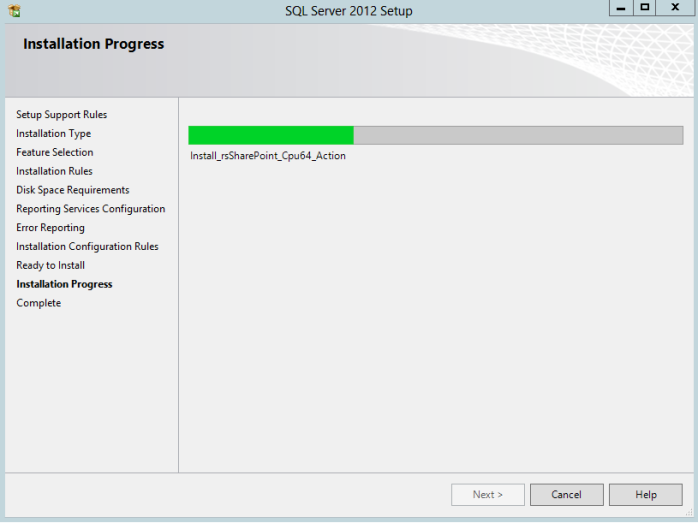
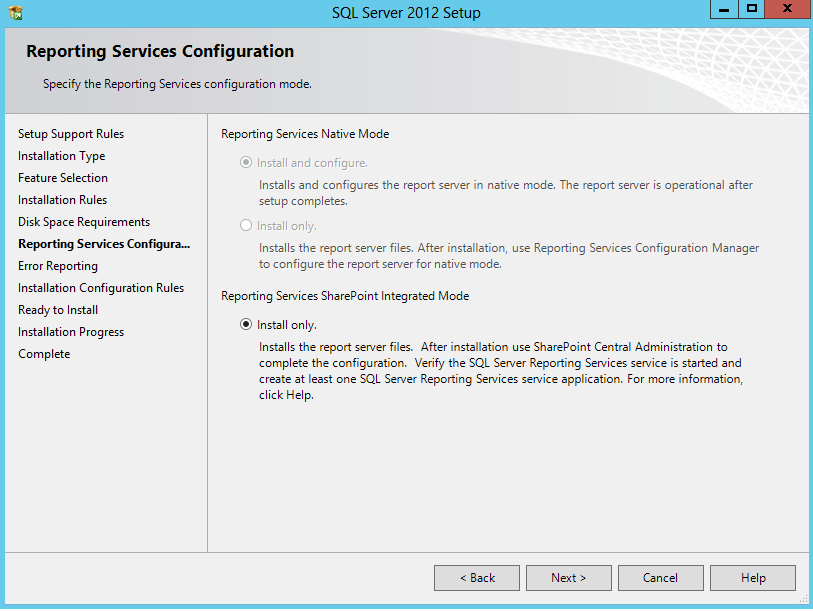
- In reporting services configuration, default selection will be “Reporting services SharePoint Integrated Mode” – Install only

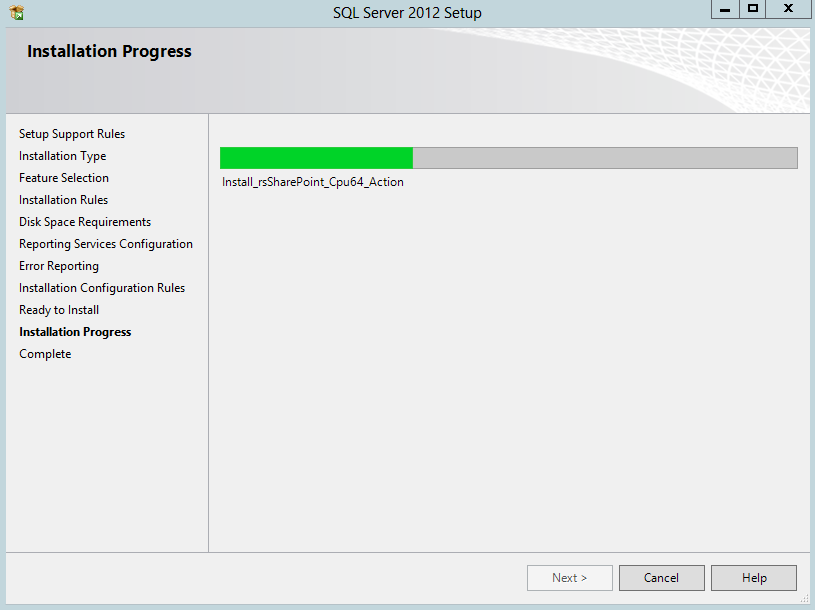
- After few “Next” clicks you will be ready to install Reporting Services features
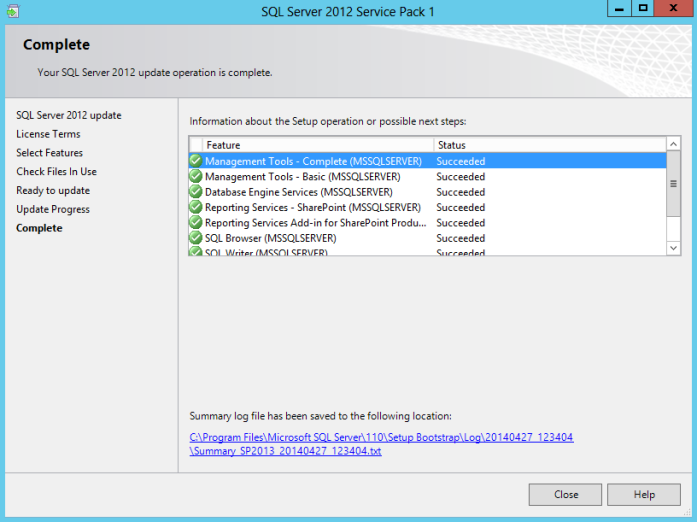
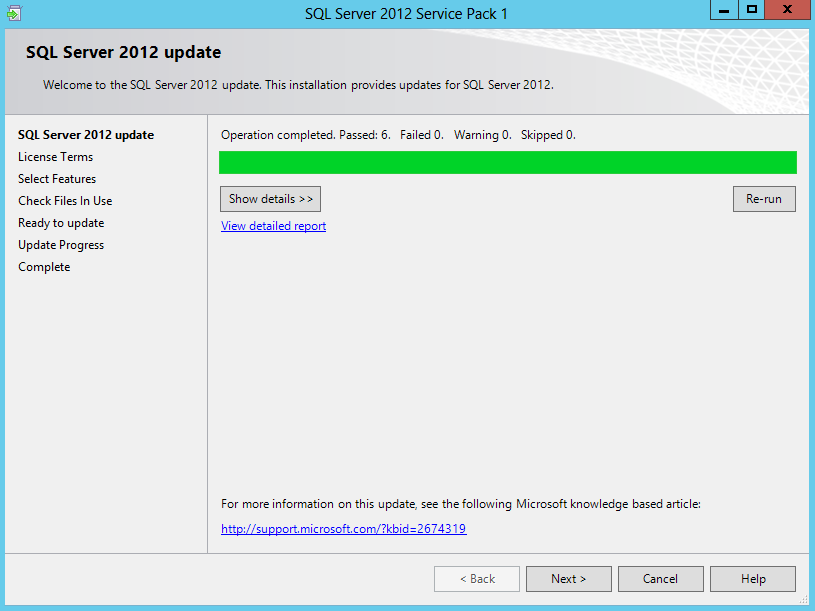
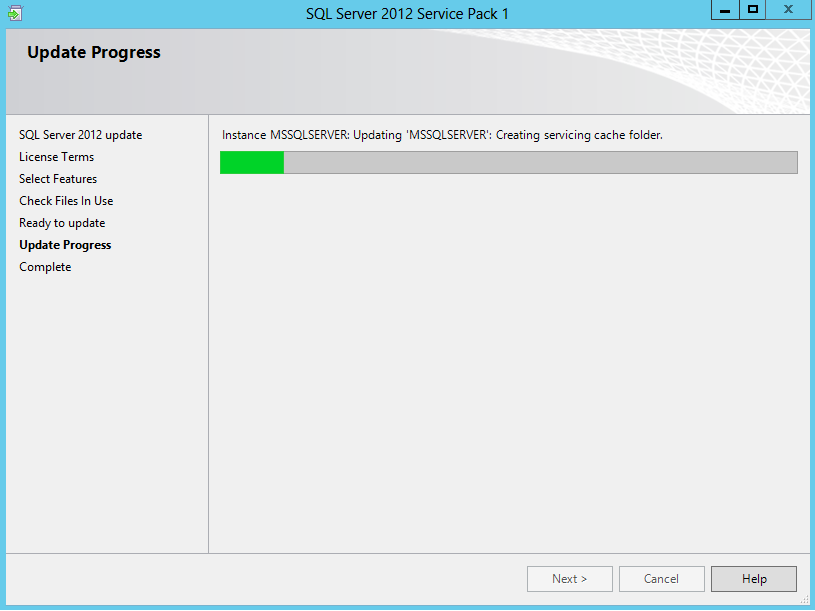
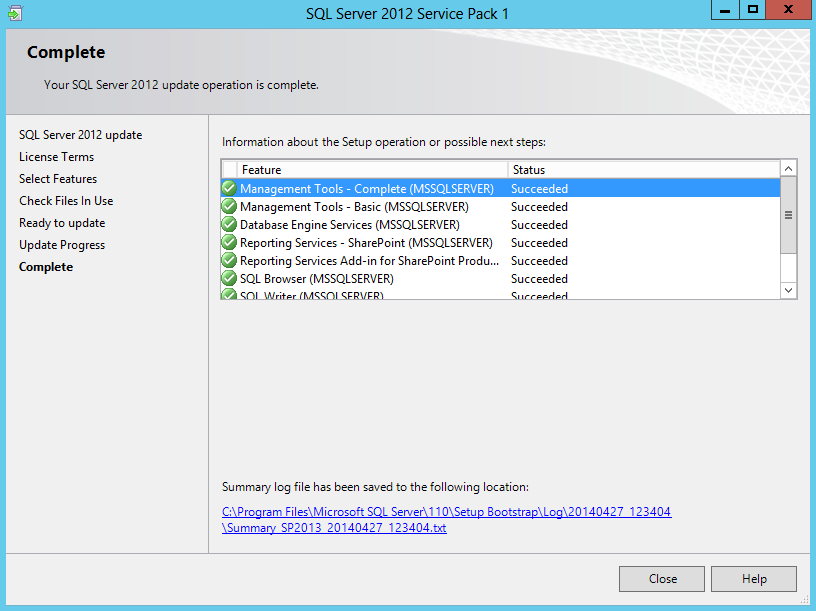
 Step 2 – Install SQL Server 2012 Service Pack 1
- After finishing the SQL server reporting services feature, at the end it is a SharePoint service application like i mentioned at the beginning of the topic, to register this service you have to run Power Shell commands to achieve that however, if you try to do so, you will get the following error message:
The term ‘Install-SPRSService’ is not recognized as the name of a cmdlet, function, script file, or operable program. Check the spelling of the name, or if a path was included, verify that the path is correct and try again
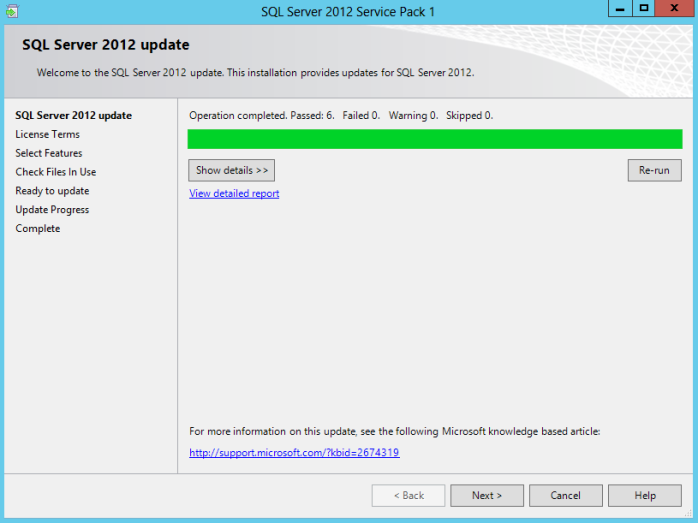
This happens because SQL Server 2012 SP1 installation is a requirement and MUST be installed to get the service registered to your SharePoint farm.
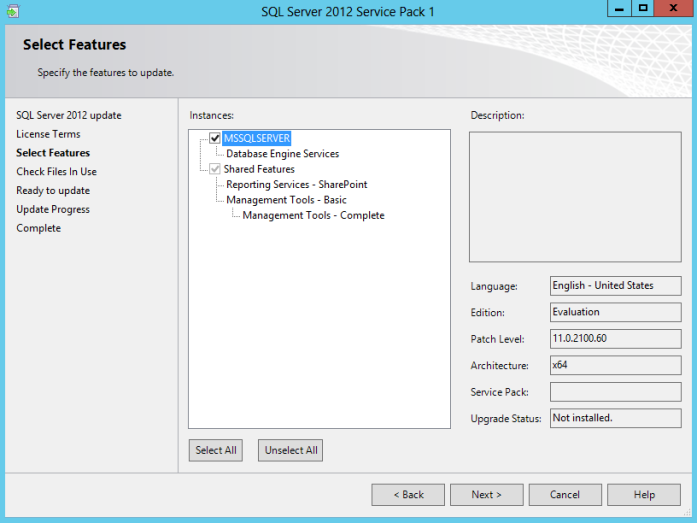
- To install SQL server 2012 SP1, you can download SP1 from here, then run the installation.

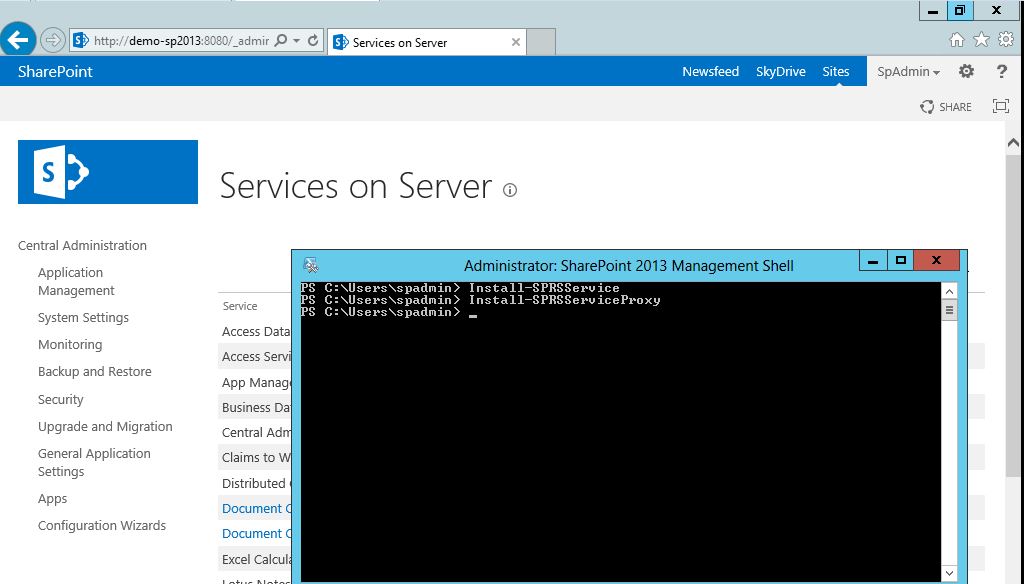
 Step 3 – Register Reporting Services Service in SharePoint Farm
- Now you can run the required script to register the service in your farm by opening “SharePoint 2013 Management Shell” as administrator and type the following commands:
- Install-SPRSService
-
Install-SPRSServiceProxy
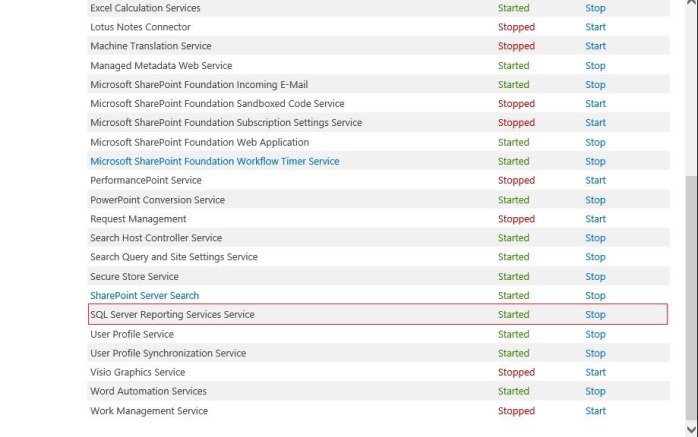
Starting the SSRS service:
get-spserviceinstance -all |where {$_.TypeName -like "SQL Server Reporting*"} | Start-SPServiceInstance

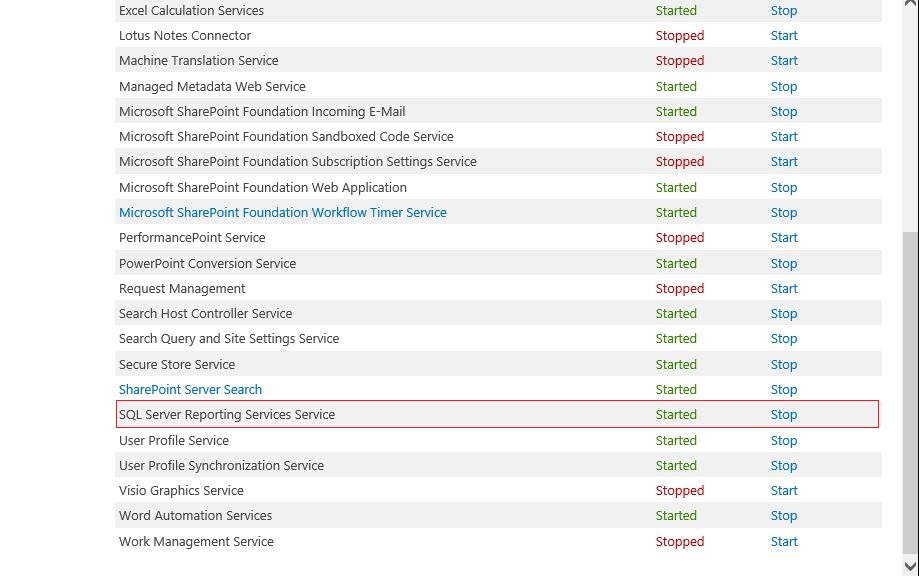
- Now SQL server reporting service will be a registered service in your farm, click start to start the service.
 Step 4 – Add SQL Server Reporting Services Service Application to SharePoint Farm
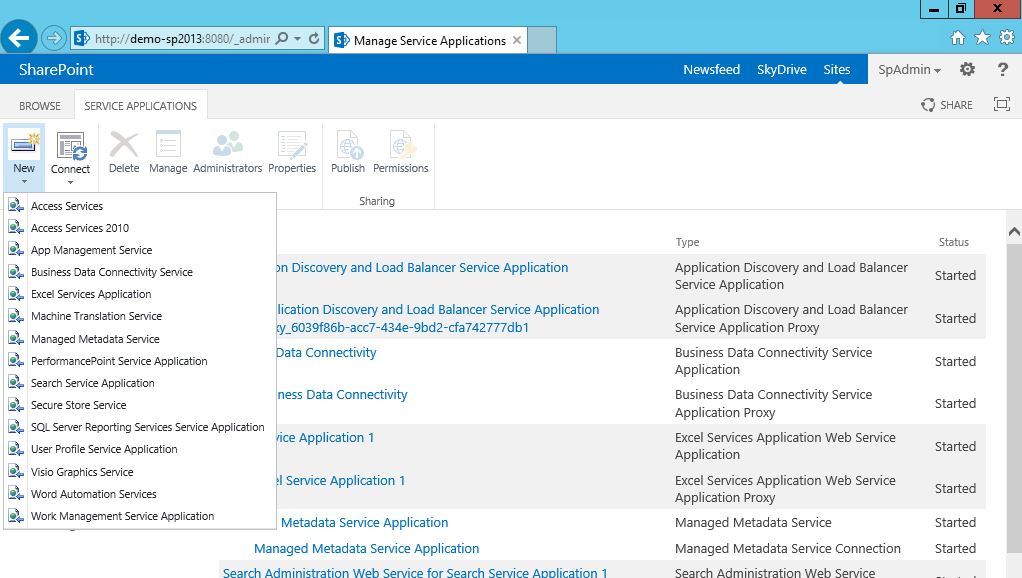
- Open SharePoint 2013 central administration and select “Application Management” then select “Manage Service Applications”
- Click “New” in ribbon menu to add new service application, then select “SQL Server Reporting Services Service Application”

- Fill the required data to create a new instance of the service then click Ok
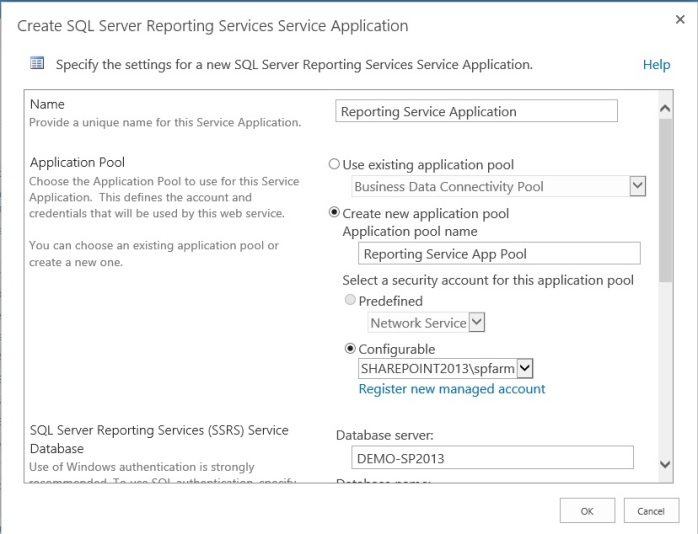
Note: Select web applications you need this service to be associated with them before clicking OK
 Step 5 – Activate “Report Server Integration Feature” in SharePoint Site Collection
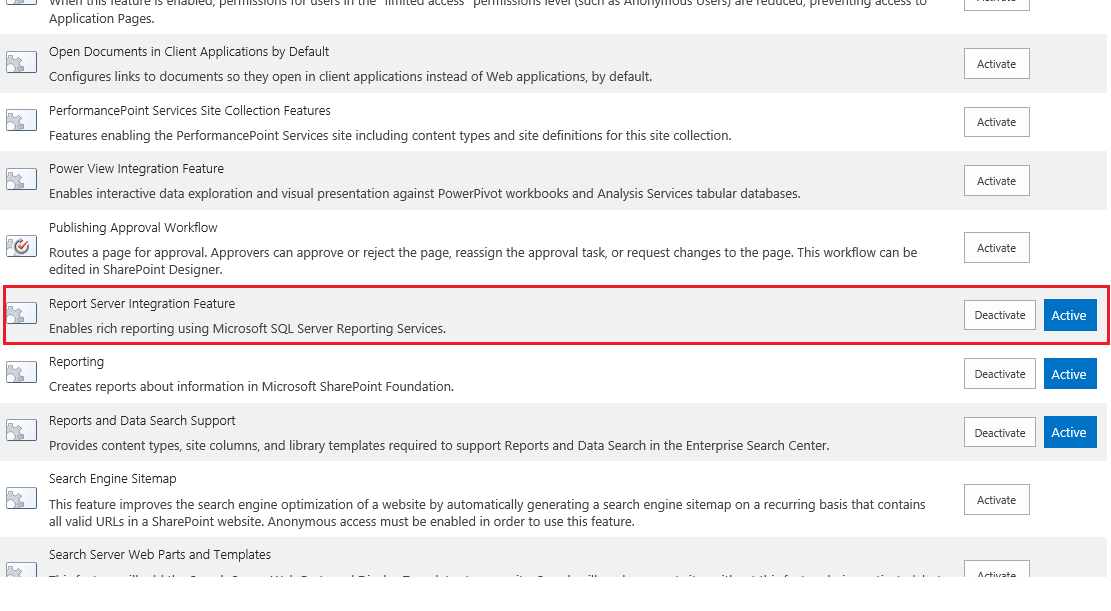
- After success installation and configuration for the previous steps, you should activate “Report Server Integration Feature” at site collection level to get reporting services content types that you will use to create reports in SharePoint.
- Go to your site collection, select “Site Settings” then navigate to “Site collection features”At many cases, you will not be able to see this feature available at your site collection, this is because of some reasons cause a problem in “Reporting Services Add-in for SharePoint Products” installation step.
- To solve this and get the feature available at site collection level, do the following steps:
- Download Microsoft® SQL Server® 2012 SP1 Reporting Services Add-in for Microsoft® SharePoint®
- Run installation file which will repair the installation problem, then you will find the feature available after that.
 Step 6- Any how Report Server Integration Feature is not appeared then follow the below step
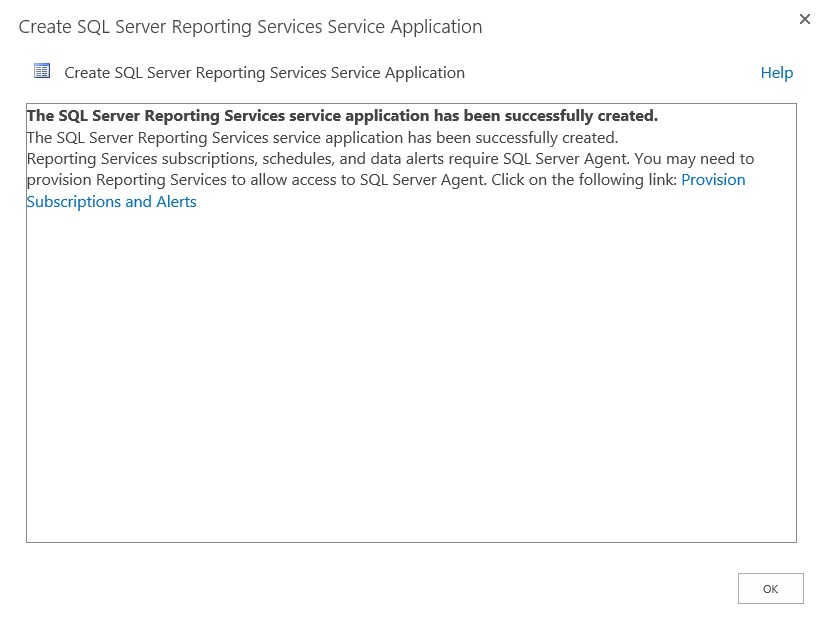
- [I] Go to Service Application - Click on SQL Server Reporting Services Service Application

- [II] Click on Provision Subscriptions and Alert on Manage Reporting Services Application.

- [III] Click on Download SQL Script and run those script into SQL Server Master database(Report Server Integration Feature would be activated 100%).

- [IV] Click on Download script , save script and run in your SQL Server

Step 7 – Add Reporting Service Content Types to SharePoint Library
- Open SharePoint site collection and go to “Site Content” then select “Add an app” and create a new document library.
- Go to library setting and open “Advanced Settings” to allow managing content types
- Select add from existing site content types.
- Now you can see “Report Builder” and “Report Data Source” content types.
To scale out your farm do the following:
- For each application server in your farm, “Reporting Services Feature” should be installed with “Reporting Services Add-in for SharePoint Products”
- For each web front end server, you should install “Reporting Services Add-in for SharePoint Products” Only.
Note: - Sometime following error occurred in the SQL Server Reporting:
[http://sharepoint2013suresh.blogspot.in/2014/02/how-to-configure-reporting-services.html]
Error 1:
Web Part Error: A Web Part or Web Form Control on this Page cannot be displayed or imported. The type Microsoft.ReportingServices.SharePoint.UI.WebParts.ReportViewerWebPart, Microsoft.ReportingServices.SharePoint.UI.WebParts, Version=11.0.0.0, Culture=neutral, PublicKeyToken=89845dcd8080cc91 could not be found or it is not registered as safe. Correlation ID: 27a1579c-5445-00e2-0000-0738bef219cc.
Solution: Add the following line in the web.config file of the sharepoint web application.
Error 2:
"The Report Viewer Web Control HTTP Handler has not been registered in the application's web.config file. Add
to the system.web/httpHandlers section of the web.config file, or add
to the system.webServer/handlers section for Internet Information Services 7 or later."
Solution: Add the following line in the web.config file of the sharepoint web application.
In this article I am going to make out the steps required for installing and configuring SQL Reporting services on SharePoint 2013. Below steps included are based on my experience while configuring SQL Reporting services on SP 2013.
Microsoft has released better architecture and manageability in SQL server 2012 edition with SharePoint 2013 integrated mode. In this article i will show you how to install and configure SQL server 2012 reporting services SharePoint integrated mode, and common errors which may happen during the configuration.
SQL server 2012 reporting service architecture has been changed with SharePoint server 2013. Microsoft took the engine, the service and hosting layer and wrapped them in a new SharePoint service application, so you will manage reporting services in your SharePoint farm as a service application, awesome!
- Windows server 2012
- SQL server 2012 Enterprise (Database engine only installed)
- SharePoint server 2013 Enterprise
The same procedures in this article will also be the same in case of having SQL server in a separate box (recommended).
Step 1 – Installing SQL Server Reporting Services Feature in SharePoint Server Farm (Application server)
SQL server reporting services is the licensed part of the installation and this feature should be installed in all application servers in your farm.
- Run SQL server 2012 installation file.
- Select “New SQL Server stand-alone installation or add features to an existing installation”
- Select “Add features to an existing instance of SQL Server 2012″ then select your instance name from the drop down list.
- In features selection, select “Reporting Services – SharePoint” and “Reporting Services Add-in for SharePoint Products”

- In reporting services configuration, default selection will be “Reporting services SharePoint Integrated Mode” – Install only
- After few “Next” clicks you will be ready to install Reporting Services features
Step 2 – Install SQL Server 2012 Service Pack 1
- After finishing the SQL server reporting services feature, at the end it is a SharePoint service application like i mentioned at the beginning of the topic, to register this service you have to run Power Shell commands to achieve that however, if you try to do so, you will get the following error message:
The term ‘Install-SPRSService’ is not recognized as the name of a cmdlet, function, script file, or operable program. Check the spelling of the name, or if a path was included, verify that the path is correct and try again
This happens because SQL Server 2012 SP1 installation is a requirement and MUST be installed to get the service registered to your SharePoint farm.
- To install SQL server 2012 SP1, you can download SP1 from here, then run the installation.

 Step 3 – Register Reporting Services Service in SharePoint Farm
- Now you can run the required script to register the service in your farm by opening “SharePoint 2013 Management Shell” as administrator and type the following commands:
- Install-SPRSService
- Install-SPRSServiceProxy
Starting the SSRS service:
get-spserviceinstance -all |where {$_.TypeName -like "SQL Server Reporting*"} | Start-SPServiceInstance
- Now SQL server reporting service will be a registered service in your farm, click start to start the service.
Step 4 – Add SQL Server Reporting Services Service Application to SharePoint Farm
- Open SharePoint 2013 central administration and select “Application Management” then select “Manage Service Applications”
- Click “New” in ribbon menu to add new service application, then select “SQL Server Reporting Services Service Application”
- Fill the required data to create a new instance of the service then click Ok
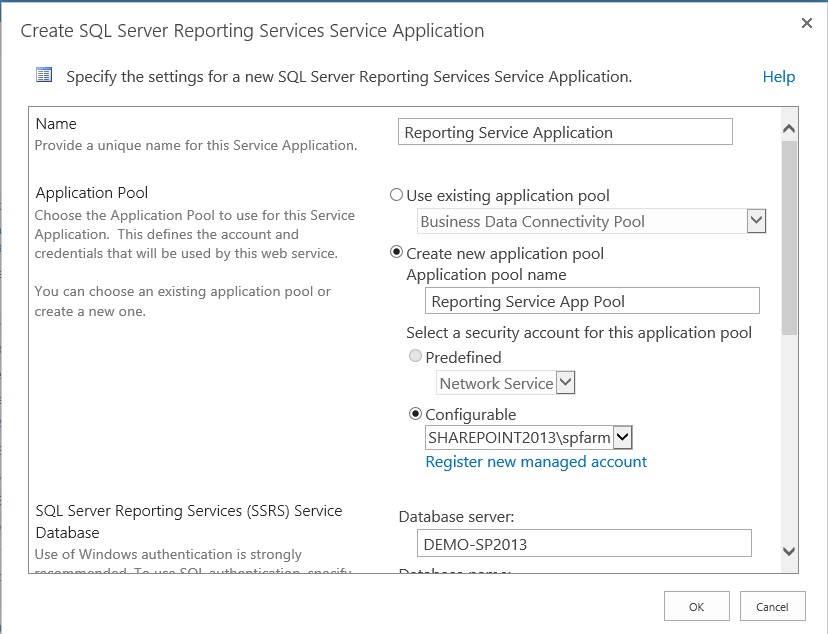
Note: Select web applications you need this service to be associated with them before clicking OK
 Step 5 – Activate “Report Server Integration Feature” in SharePoint Site Collection
- After success installation and configuration for the previous steps, you should activate “Report Server Integration Feature” at site collection level to get reporting services content types that you will use to create reports in SharePoint.
- Go to your site collection, select “Site Settings” then navigate to “Site collection features”At many cases, you will not be able to see this feature available at your site collection, this is because of some reasons cause a problem in “Reporting Services Add-in for SharePoint Products” installation step.
- To solve this and get the feature available at site collection level, do the following steps:
- Download Microsoft® SQL Server® 2012 SP1 Reporting Services Add-in for Microsoft® SharePoint®
- Run installation file which will repair the installation problem, then you will find the feature available after that.
Step 6- Any how Report Server Integration Feature is not appeared then follow the below step
- [I] Go to Service Application - Click on SQL Server Reporting Services Service Application
- [II] Click on Provision Subscriptions and Alert on Manage Reporting Services Application.
- [III] Click on Download SQL Script and run those script into SQL Server Master database(Report Server Integration Feature would be activated 100%).
- [IV] Click on Download script , save script and run in your SQL Server
Step 7 – Add Reporting Service Content Types to SharePoint Library
- Open SharePoint site collection and go to “Site Content” then select “Add an app” and create a new document library.
- Go to library setting and open “Advanced Settings” to allow managing content types
- Select add from existing site content types.
- Now you can see “Report Builder” and “Report Data Source” content types.
To scale out your farm do the following:
- For each application server in your farm, “Reporting Services Feature” should be installed with “Reporting Services Add-in for SharePoint Products”
- For each web front end server, you should install “Reporting Services Add-in for SharePoint Products” Only.
Note: - Sometime following error occurred in the SQL Server Reporting:
[http://sharepoint2013suresh.blogspot.in/2014/02/how-to-configure-reporting-services.html]
Error 1:
Web Part Error: A Web Part or Web Form Control on this Page cannot be displayed or imported. The type Microsoft.ReportingServices.SharePoint.UI.WebParts.ReportViewerWebPart, Microsoft.ReportingServices.SharePoint.UI.WebParts, Version=11.0.0.0, Culture=neutral, PublicKeyToken=89845dcd8080cc91 could not be found or it is not registered as safe. Correlation ID: 27a1579c-5445-00e2-0000-0738bef219cc.
Solution: Add the following line in the web.config file of the sharepoint web application.
Error 2:
"The Report Viewer Web Control HTTP Handler has not been registered in the application's web.config file. Add
to the system.web/httpHandlers section of the web.config file, or add
Solution: Add the following line in the web.config file of the sharepoint web application.
And
Error 3- Controls not rendered properly on RSViewerPage.aspx (http://forums.bitwiseglobal.com/forum/sharepoint/controls-not-rendered-properly-on-rsviewerpage-aspx-im ages-missing/)
ANS:- Problem: While working with deploying an web application that uses SSRS on to a sharepoint server, sometimes RSViewerPage.aspx doesn't display images of controls properly, it just displays test instead of controls. If you dig further you will notice that requests on Reserved.ReportViewerWebPart.axd are throwing 404.
http:// sitename /Reserved.ReportViewerWebPart.axd?OpType=Resource&Version=11.0.3000.0&Name=Microsoft.ReportingServices.SharePoint.UI.WebParts.Report.gif
To fix this add below entry in handlers under system.webserver tag in webconfig of the said web application
< add name="ReportViewerWebPart" verb="*" path="Reserved.ReportViewerWebPart.axd" type="Microsoft.ReportingServices.SharePoint.UI.WebParts.WebPartHttpHandler, Microsoft.ReportingServices.SharePoint.UI.WebParts, Version=11.0.0.0, Culture=neutral, PublicKeyToken=89845dcd8080cc91" / >
Enjoy with this SharePoint Stuff !
No comments:
Post a Comment